
Planning Workflow
The Planning task panel is part of the Studio UG user interface; a container for underground planning functions. Tasks are hosted within a Studio Control Bar. The contents of this panel will automatically update according to the selection made on the Planning ribbon.
Planning tasks are tools that will help you progress from the initial input of design data through the application of planning attributes, the solid creation, evaluation and sequencing rules and supporting information. The aim is to use the initial data as a basis for a 3-dimensional underground design that is broken down into 'segments', each representing an activity that forms a key part of the schedule of your operational underground mine plan.
This information is then fed seamlessly into Datamine's Datamine Task Scheduler application where additional attributes can be applied, and a practical schedule considering your operational constraints e.g. ‘resource capacities’ can be produced. An existing file can be quickly and easily updated with design changes using Studio UG.
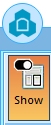
Studio UG utilizes a reusable control bar in which to host planning task functions. This panel can be hidden or shown as required using the Show toggle on the left of the Planning ribbon:
Toggling the task panel on or off will not alter previously-defined contents.
The Planning Workflow
The planning workflow is an integral part of your application, constructed to allow design files to be progressively appended and associated with additional information that will ultimately control how your sequence will be generated. At each stage, you impart more information to the schedule.
In brief, your planning project and associated data is appended and modified as you progress through the workflow, starting with basic project settings and design files and ending up with a series of spatial activities that represent operational scheduling.
|
|
Design files are added using the Project Settings panel. This panel allows you to add any file on disk and assign it to one of the four design types, design a naming convention for your activities within your schedule and define how your input geological model will be evaluated ('interrogated') to provide reserves feedback. Project settings differ depending on whether you are setting up a master or sub project. |
|
|
The Preparation panel is used to ready your design data for processing. This includes attribution and geometrical editing of design data plus the creation of 'design definitions' and connecting these to your data. |
|
|
Your data goes through a series of validation routines to ensure it is suitable for scheduling. The type/level of validation to be performed is configured using the Validation Options panel. |
|
|
Derived activities in a schedule are those activities that contain properties derived from other 'defined' activities in the mine design. You use the Processing panel to define these. You then Process your design files according to their design definitions, generating outputs for each of the design types. |
|
|
Set up any activity dependencies, and the types of dependencies using the Dependencies panel, Dependencies can either be manually assigned or automatically assigned based on specified rules. |
|
|
Export your project data to Datamine Task Scheduler (DTS) to refine your schedule with more granular controls. |
|
|
Generate and review planning reports based on your schedule and data configuration using the Utilities panel. |
Data Validation
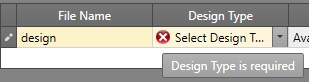
Planning task panels will
automatically validate your input as immediately as possible. Where
data entry requires your attention, you will be alerted by a red cross
within the respective field. Hovering over the red cross will display
more information on the results of validation e.g.:
These "field warnings" are shown in the following circumstances:
- Data has not been entered, but is required for planning functions to continue without error (as above).
- Data has been entered that does not match a required format (this could be the actual value entered, or the properties of that value such as an exceeded string length, for example).
A “validate as you go” approach aims to avoid the belated identification of setup problems and unnecessary rework.
Project Settings Toolbar
All planning tasks feature a useful slide-out toolbar on the left edge of the screen. Displayed by default, it can be hidden.
Each tool provides access to one of the settings panels relevant to the current project, or if you are using a master project, the sub-projects that are included. The following tools are accessible:
If the toolbar is hidden, click the expander bar on the left. For example, on the Settings pane:
The Project Settings toolbar displays:
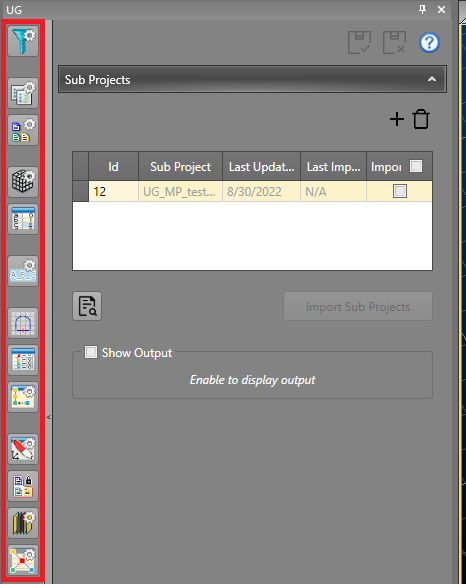
Select a tool to display the appropriate settings screen.
Data Storage
Many tasks are supported by save and discard options:
- Save changes: this will update the Studio UG database with the latest information on the displayed form. If no changes have been made since the last save, this icon is disabled.
- Discard changes: undo any changes made since the last save, leaving the task displayed. You cannot redo this action.
Importing and Exporting Data
You can import and export data on panels like this one using the following buttons:
 Import XML data containing settings information
for this task
Import XML data containing settings information
for this task
 Export the currently defined data
Data is stored in XML format and can be transferred to other UG projects and systems, for example.
Context-sensitive Help
Each task is supported by one or more dedicated context-sensitive Help pages. To access help, press <F1> whilst a panel is displayed and in focus (i.e. at least one element of the form is selected).
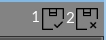
Table Editing Tools
Generally, where tabular data is presented in Studio UG, and you can interact with its contents, you may find one or more of the following controls just above the table:

|
Add a new item to the table. |

|
Remove the selected item from the table. |

|
Insert the next new item above the currently selected item (default is off = insert below). |

|
Move the selected item down the list by one position. |

|
Move the selected item up the list by one position. |